
Whitelisting Explained
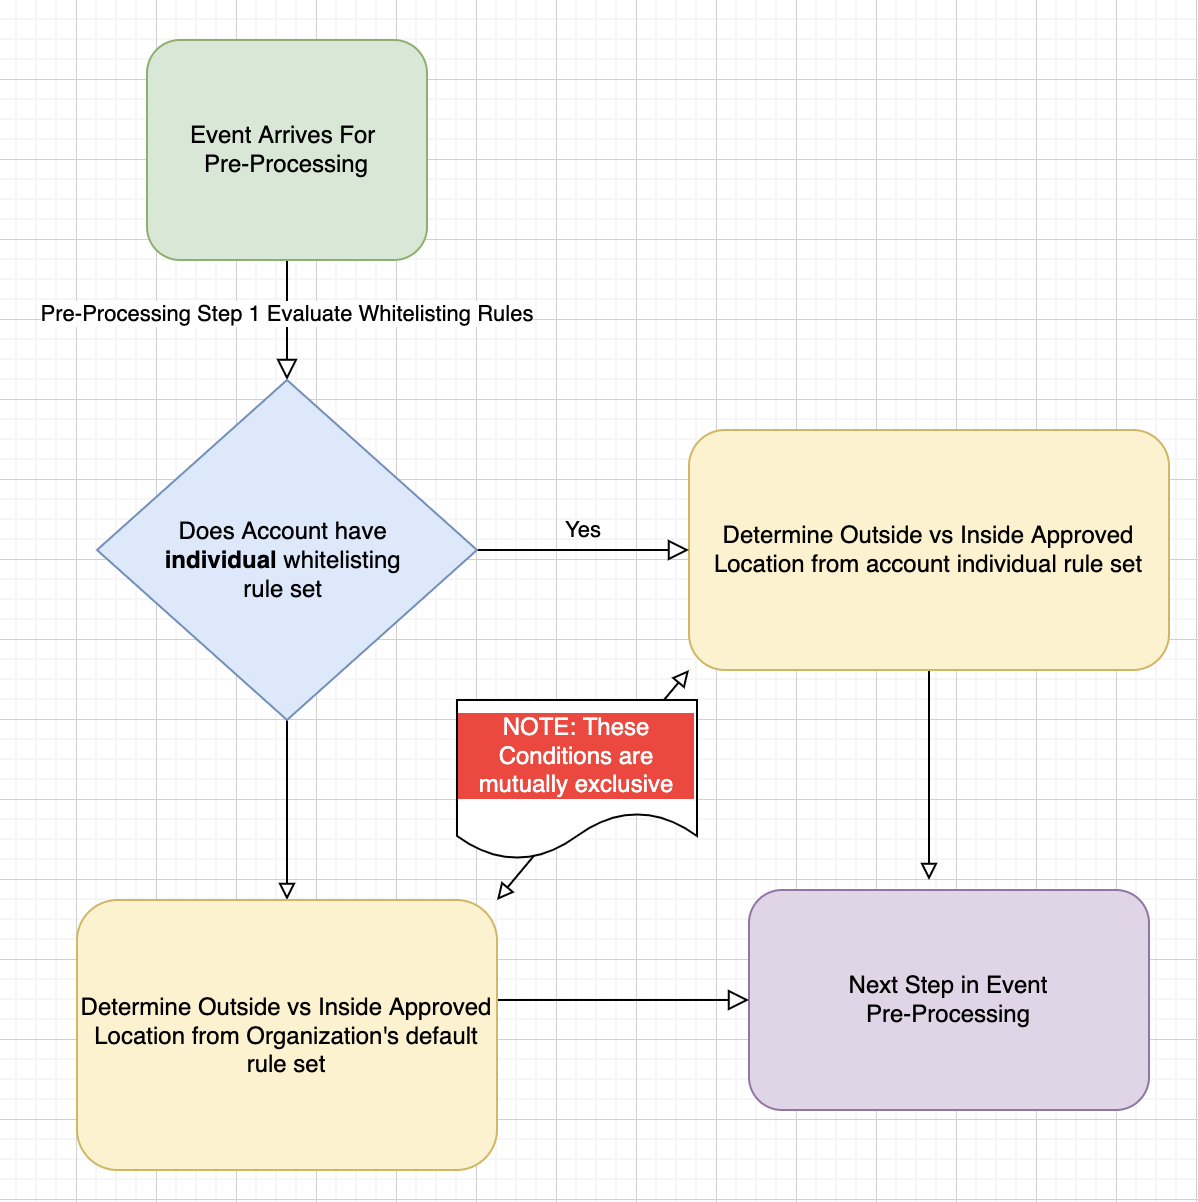
Whitelisting can be set at the Organizational Level and the User Level. It is important to note that User Whitelist Settings supersede Organization Whitelist Settings. This means that when adding a whitelisted location to a user the organization's whitelisting rules will no longer apply. The image below shows the logic and process that occur when an alert is processed.
How to Edit Organization Level Whitelist Settings
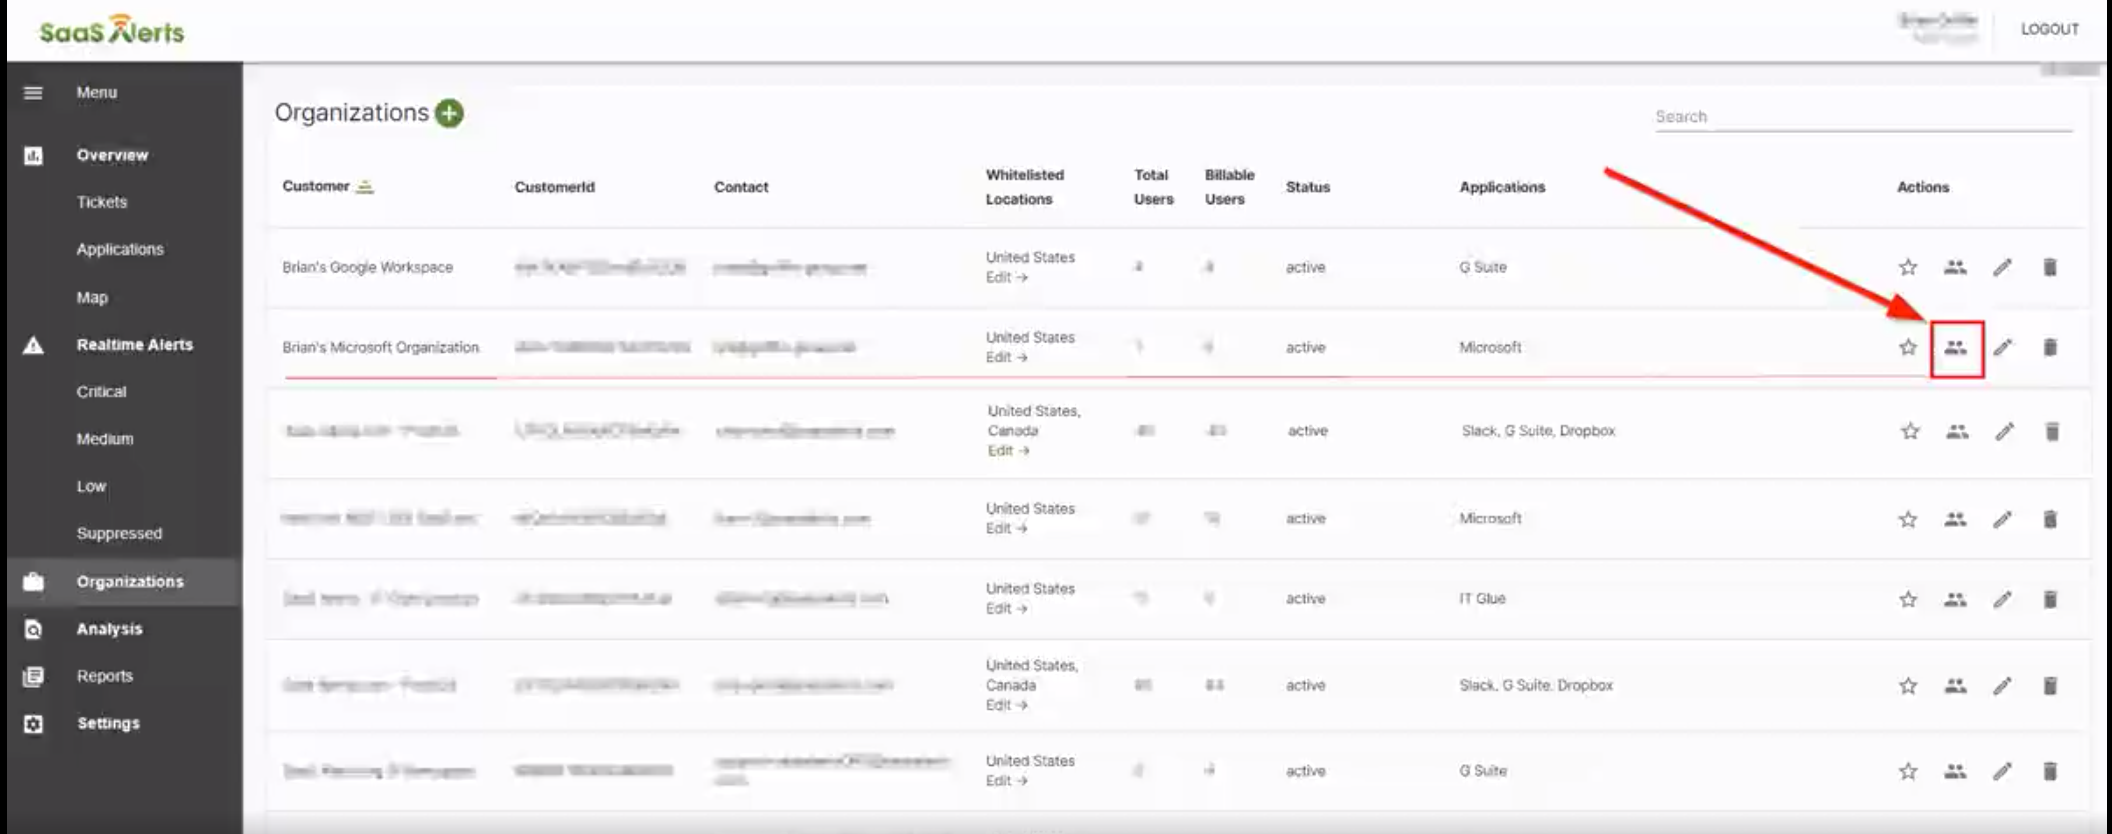
Select The Organization
-
Log into SaaS Alerts.
-
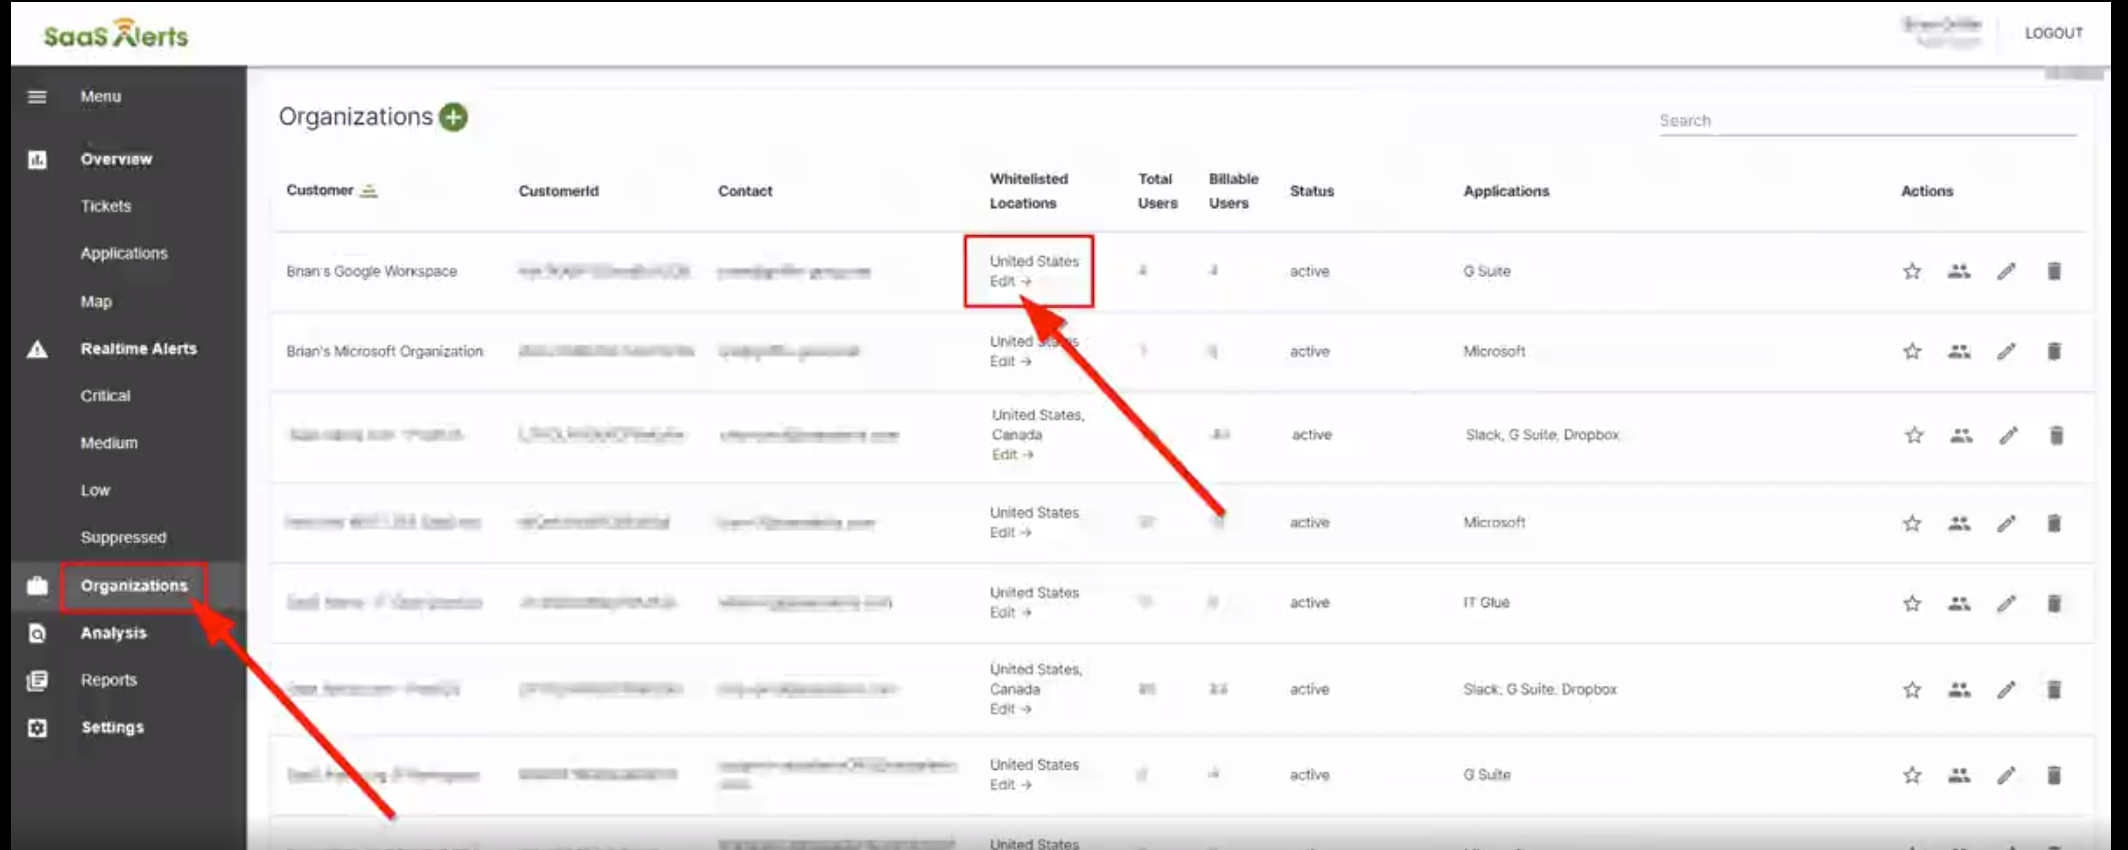
Click on "Organizations" from the left side of the window.
-
Click on "Edit" within the "Whitelisted Locations" column for the Customer Organization.
Configuring Whitelist Rules - Country
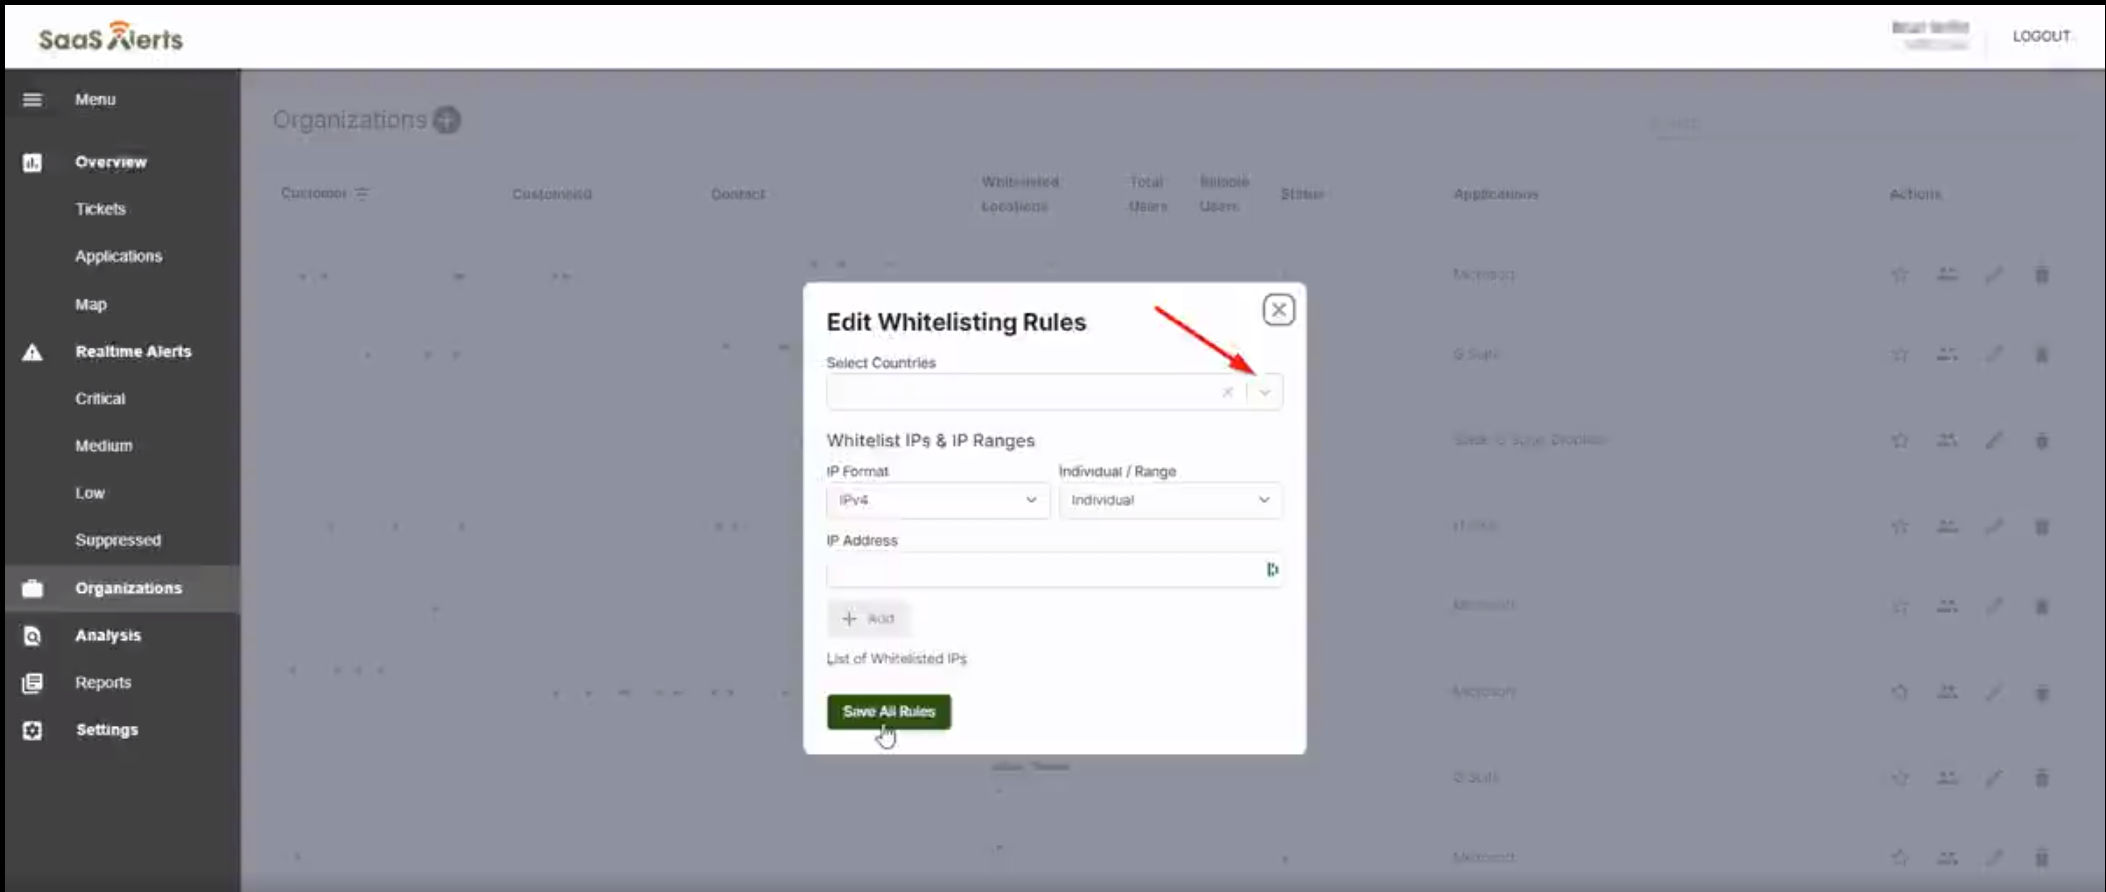
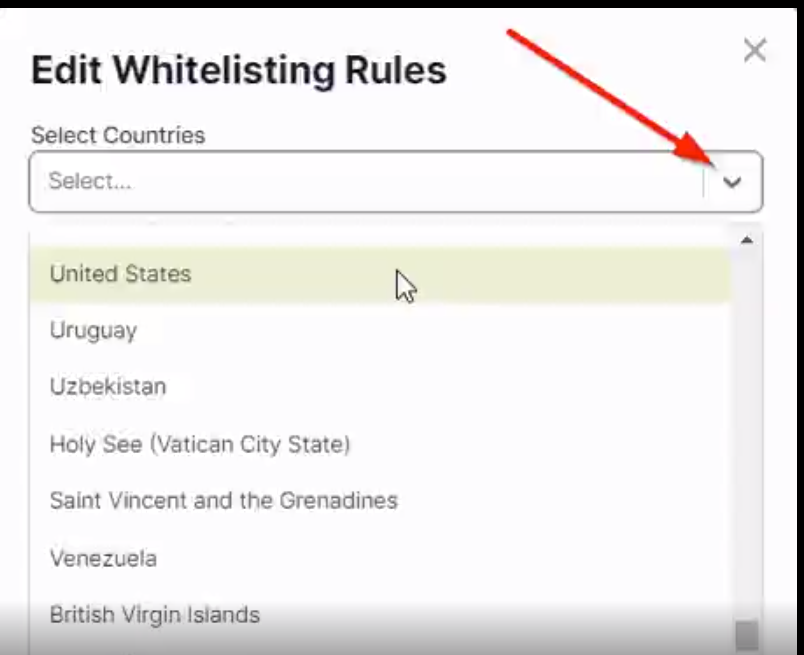
In the "Edit Whitelisting Rules" Window click the down arrow to select a Country to Whitelist.
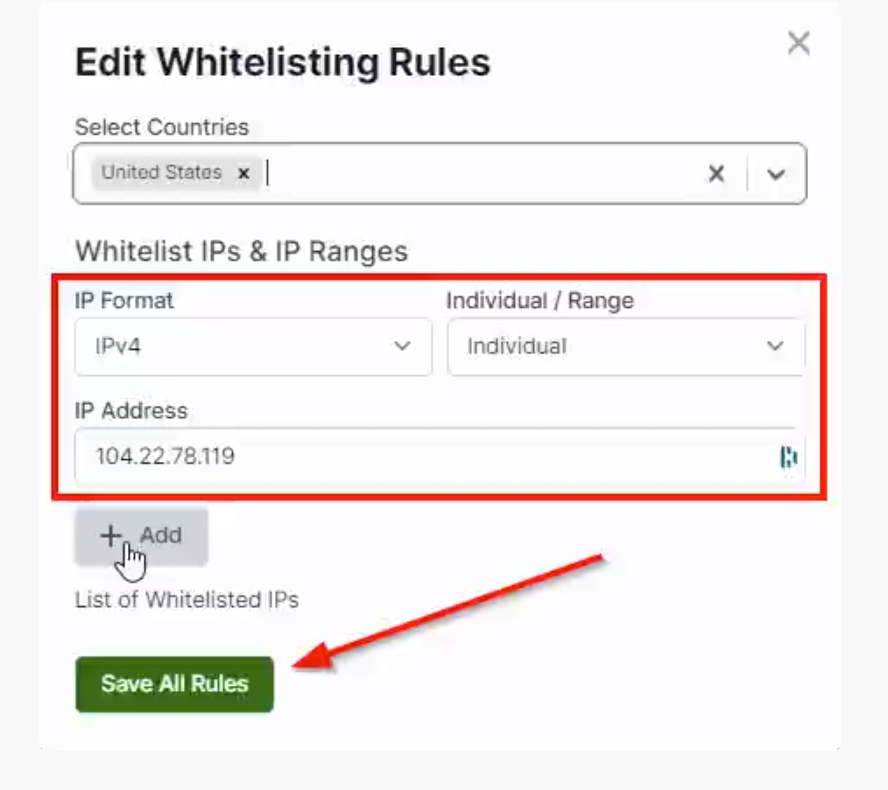
Configuring Whitelist Rules - IP Address
-
In the "Edit Whitelisting Rules" Window you can select "IP Format", and an "Individual / Range" of IP addresses.
-
Click the "Add" button to add the Country and IP settings to SaaS Alerts.
-
Click on "Save All Rules" to apply these settings
How to Edit User Level Whitelist Settings
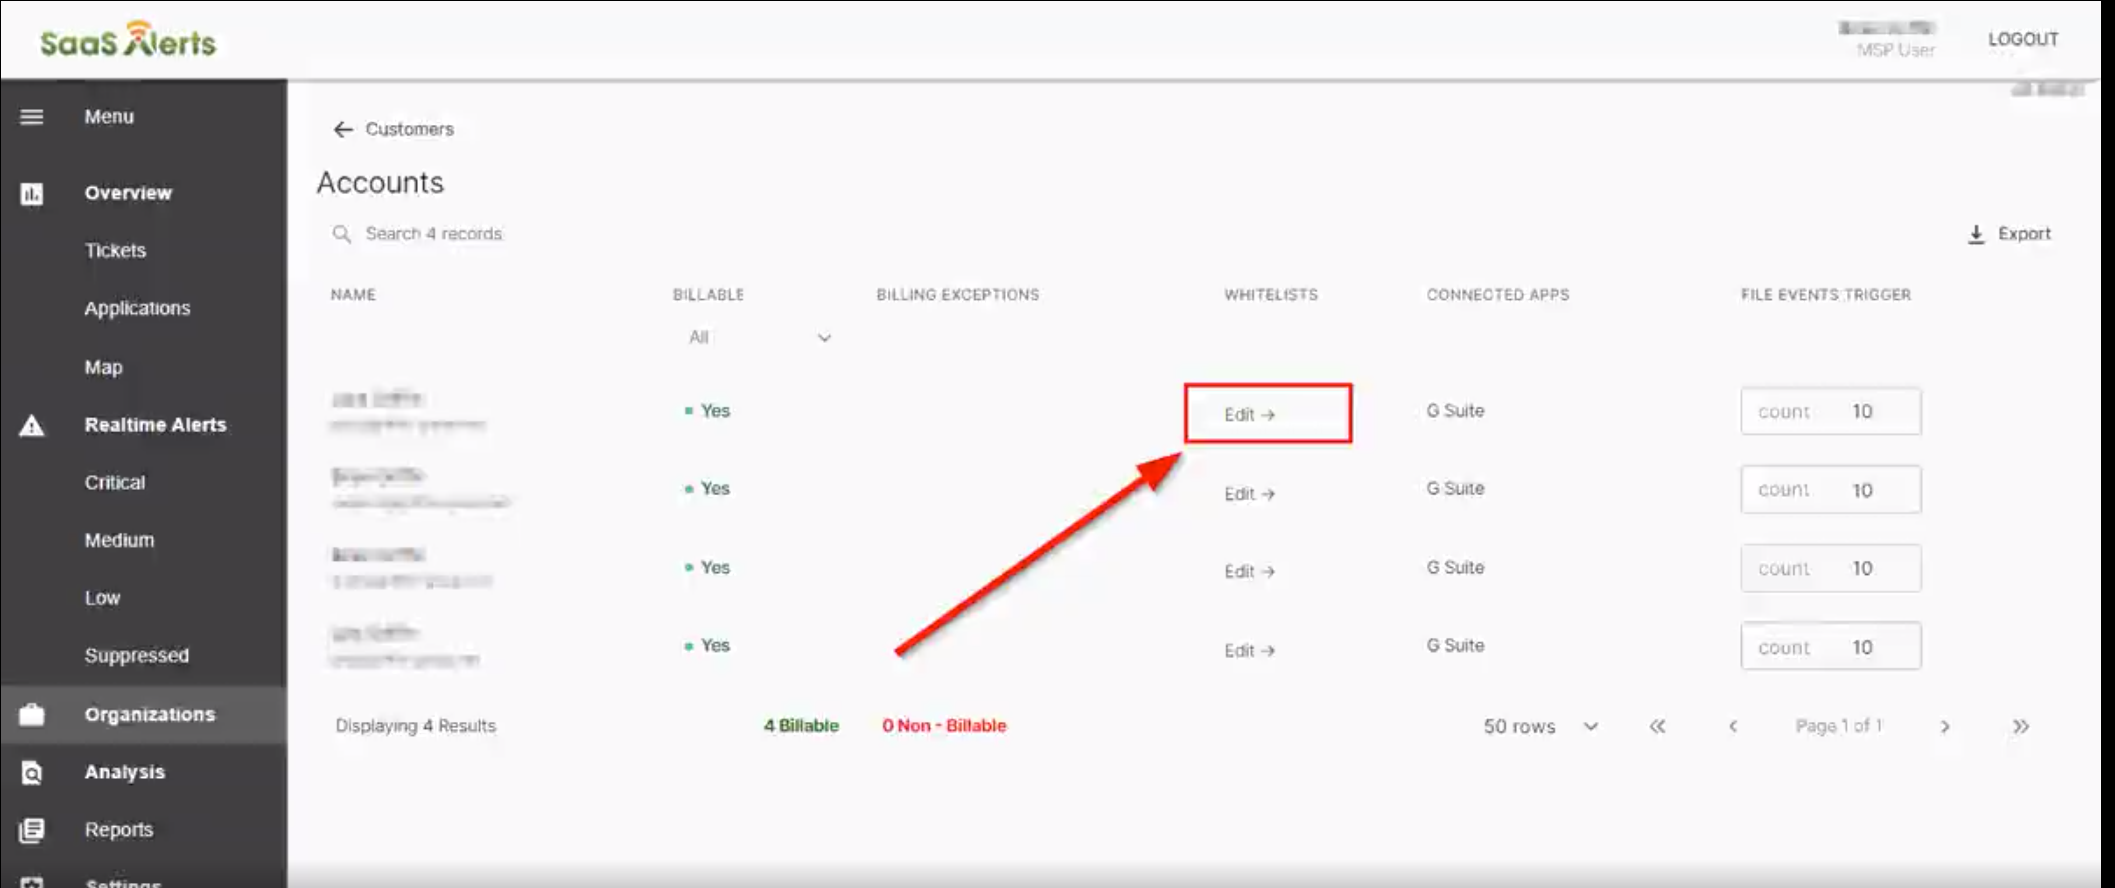
Selecting the User
-
Log into SaaS Alerts.
-
Click on "Organizations" from the left side of the window.
-
Click on the "Users" Icon for your Customer.
Configuring User Whitelist Rules - Country
Under the "Whitelist" column click on "Edit" for desired the user.
In the "Edit Whitelisting Rules" window click the down arrow to select a Country to Whitelist.
Comments
0 comments
Please sign in to leave a comment.