
Once you have configured The Respond Module with a rule(s), Respond will Alert you when these rules are triggered. But, what actions can be taken in a rule?
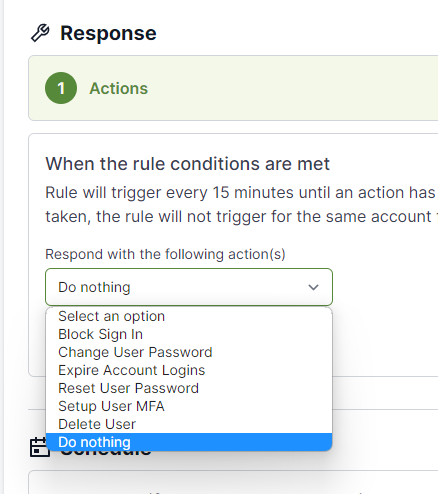
1. Block Sign In
This action will disable access to a Microsoft 365 / Azure AD account by blocking the account from signing in.
Important: If Respond blocks a user from having sign-in access to Office 365, it might take as long as 24 hours to take effect on all that user’s devices and clients. If you need to immediately prevent a user's sign-in access you must Expire Account Logins, and reset their password.
Pro tip: These three Respond actions work well together "Block Sign In" "Reset User Password" and "Expire Account Logins" to sign the user out of all apps and sessions.
2. Change User Password
This will force a mandatory password change and the end user will have to change the password in the next sign in.
Important: Users do not get an email notification that their password needs to be changed.
3. Expire Logins
This will initiate a one time event that will sign the user out of all Microsoft Office 365 sessions.
Important: This action can take up to 15 minutes for process to complete. This user will be able to immediately sign back in, unless you have also blocked their sign-in status.
4. Reset User Password
This action will perform the following steps:
- SaaS Alerts will generate a new password for the user.
- SaaS Alerts will send that password to the SMS numbers configured in the rule (Usually the MSP Admin creating the rule).
- A "Change User Password" action will be triggered forcing a mandatory password change in next sign in.
5. Setup User MFA
When this Rule is triggered, it will generate a notification to the SMS numbers configured in the rule (Usually the MSP Admin creating the rule) with a link to Microsoft Office 365 to enable Multi-Factor Authentication (MFA). Below is the complete list of steps to follow:
-
In the admin center, select Users and Active Users.
-
In the Active Users section, Click on multi-factor authentication.
-
On the Multi-factor authentication page, select user.
-
Click on Enable under Quick Steps.
-
In the Pop-up window, click on Enable Multi-Factor Authentication.
Important: You must be an Office 365 global admin to set up or modify multi-factor authentication.
6. Delete User
This will delete a specific account in the Office 365 admin center "User Management" screen after the rule conditions are met.
Important: Don't delete the account if you've set up email forwarding or converted it to a shared mailbox. Both need the account to anchor the forwarding or shared mailbox.
Pro tip: When you delete a user, the account becomes inactive for approximately 30 days. You have until then to restore the account before it is permanently deleted.
Comments
0 comments
Please sign in to leave a comment.